Crochet Kenny Parka Doll: The Ultimate Fan Pattern Guide
My dearest creator, I am thrilled we are beginning this journey. There is a special kind of warmth in bringing a character to life, stitch by stitch. We shall ensure this little parka-clad wanderer is sturdy, soft, and utterly charming.

About This Creation & Our Angle
This project captures the nostalgia of pop culture through the lens of soft craft. Unlike mass-produced figures, our handmade version offers a tactile, squishy charm that fits perfectly on a collector's shelf or as a quirky desk companion. We are focusing on "clean color transitions" and "expression through shape," turning simple yarn into an iconic character.
Project Snapshot:
📊 Difficulty: Intermediate (Color changes & assembly)
⏰ Est. Time: 4-5 Hours
📏 Size: Approx. 14cm
"The magic of amigurumi lies not in complexity, but in the personality you stitch into the smallest details."
Materials & Tools Needed
🧶 Yarn: DK or Worsted Weight Cotton/Acrylic blend. You will need Bright Orange (Main), Teal/Green (Pants), Dark Brown (Trim/Mittens), Cream/Beige (Face), and a scrap of Sky Blue (Top/Back of hood).
🪡 Hook: 2.5mm (to keep stitches tight and structure firm).
✨ Other Materials: Polyester fiberfill, yarn needle, stitch markers, and black safety eyes (10mm) or black felt for pupils.

Abbreviations & Stitches Used
We will be working in continuous rounds.
📍 ch: chain
📍 sl st: slip stitch
📍 sc: single crochet
📍 inc: increase (2 sc in one st)
📍 dec: decrease (sc 2 together, preferably invisible decrease)
📍 BLO: back loop only
The Complete Little Kenny Pattern
Patricia's Shop
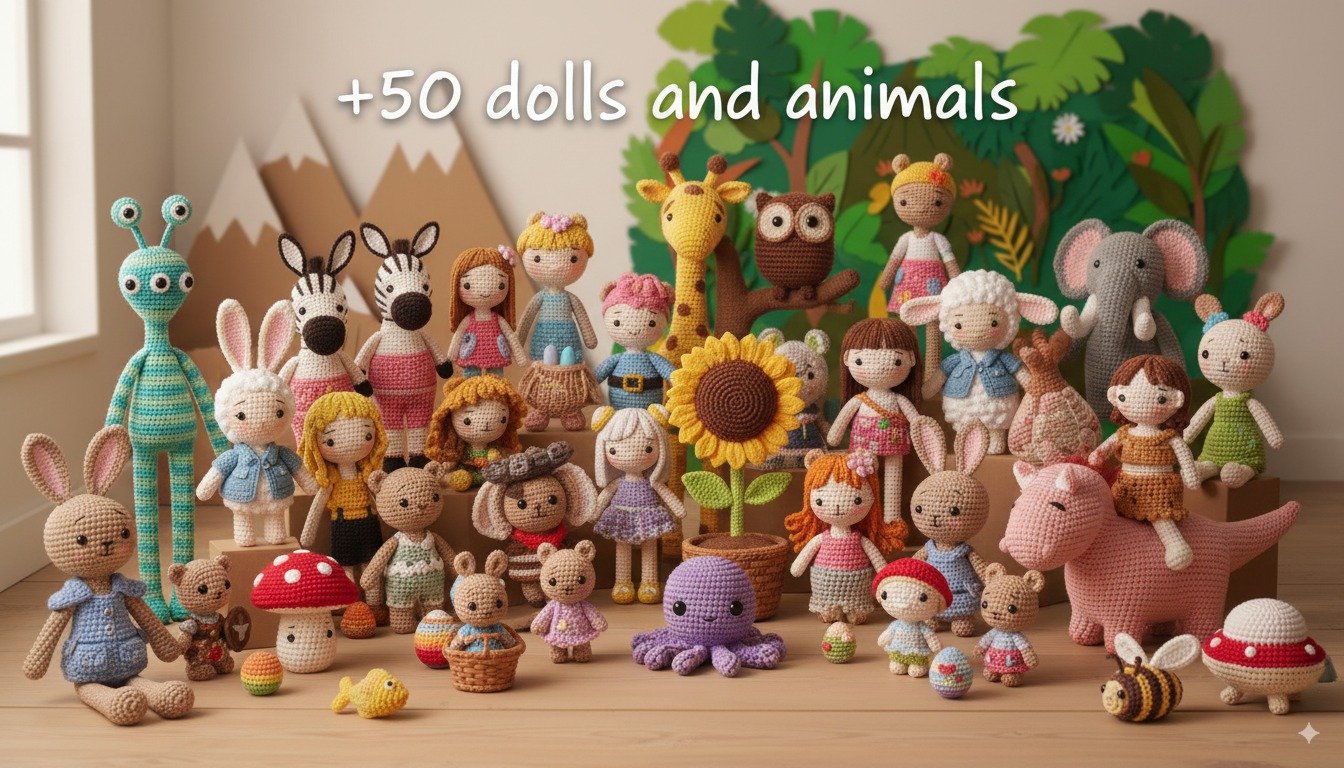
Amigurumi Mega Bundle: 50+ Dolls & Animals
Never run out of ideas! Get 27 detailed PDF patterns in one giant collection.
Amigurumi Mega Bundle: 50+ Dolls & Animals
Never run out of ideas! Get 27 detailed PDF patterns in one giant collection.
The Main Head (The Hood Base)
We begin with the hood. We will start with the Blue (top) and switch to Orange.
Rnd 1: Start with Blue yarn. 6 sc in a magic ring. (6 sts)
Rnd 2: inc in every st around. (12 sts)
Rnd 3: (sc 1, inc) x 6. (18 sts)
Rnd 4: (sc 2, inc) x 6. (24 sts)
Rnd 5: Change to Orange yarn. (sc 3, inc) x 6. (30 sts)
Rnd 6: (sc 4, inc) x 6. (36 sts)
Rnd 7: (sc 5, inc) x 6. (42 sts)
Rnd 8: (sc 6, inc) x 6. (48 sts)
Rnds 9-18: sc in each st around. (48 sts)
Rnd 19: (sc 6, dec) x 6. (42 sts)
Rnd 20: (sc 5, dec) x 6. (36 sts)
Rnd 21: (sc 4, dec) x 6. (30 sts)
Artisan's Note: Begin stuffing firmly here. We need a round, oversized look for that classic "chibi" aesthetic.
Rnd 22: (sc 3, dec) x 6. (24 sts)
Rnd 23: (sc 2, dec) x 6. (18 sts). Fasten off, leaving a long orange tail for sewing to the body.
The Face Panel
This piece sits inside the hood. Use Cream/Beige yarn.
Rnd 1: 6 sc in a magic ring. (6 sts)
Rnd 2: inc in every st around. (12 sts)
Rnd 3: (sc 1, inc) x 6. (18 sts)
Rnd 4: (sc 2, inc) x 6. (24 sts)
Rnd 5: (sc 3, inc) x 6. (30 sts)
Rnd 6: (sc 4, inc) x 6. (36 sts)
Rnd 7: sc around. (36 sts). Fasten off, leaving a long tail for sewing.
The Eyes (Make 2)
Using White yarn.
Rnd 1: 6 sc in a magic ring. (6 sts)
Rnd 2: inc in every st around. (12 sts)
Rnd 3: sl st in each st around (makes the edge smooth). Fasten off.
Artisan's Note: If using safety eyes, insert them into the center of these white circles before sewing the circles to the Face Panel.
The Hood Trim
Using Dark Brown yarn. This creates the furry lining look.
Row 1: Ch 40 (measure against your face panel to ensure it wraps around).
Row 2: Starting in 2nd ch from hook, hdc in each ch across. (39 sts)
Row 3: Ch 1, turn. sl st loosely in each st across (adds texture). Fasten off.
The Pom-Pom
Using Blue yarn.
Rnd 1: 6 sc in a magic ring. (6 sts)
Rnd 2: (sc 1, inc) x 3. (9 sts)
Rnd 3: sc around. (9 sts)
Rnd 4: (sc 1, dec) x 3. (6 sts). Fasten off.
The Body (Parka)
Using Orange yarn.
Rnd 1: 6 sc in a magic ring. (6 sts)
Rnd 2: inc in every st around. (12 sts)
Rnd 3: (sc 1, inc) x 6. (18 sts)
Rnd 4: (sc 2, inc) x 6. (24 sts)
Rnd 5: (sc 3, inc) x 6. (30 sts)
Rnd 6: (sc 4, inc) x 6. (36 sts)
Rnds 7-11: sc in each st around. (36 sts)
Rnd 12: (sc 4, dec) x 6. (30 sts)
Rnd 13: sc around. (30 sts)
Rnd 14: (sc 3, dec) x 6. (24 sts)
Rnd 15: (sc 2, dec) x 6. (18 sts). Fasten off.
The Legs/Pants (Make 2)
Start with Dark Brown (Boots).
Rnd 1: 6 sc in a magic ring. (6 sts)
Rnd 2: inc in every st around. (12 sts)
Rnd 3: BLO sc around. (12 sts)
Rnd 4: sc around. (12 sts)
Rnd 5: Change to Teal/Green. sc around. (12 sts)
Rnd 6: sc around. (12 sts). Fasten off.
The Arms (Make 2)
Start with Dark Brown (Mittens).
Rnd 1: 5 sc in a magic ring. (5 sts)
Rnd 2: inc in every st around. (10 sts)
Rnd 3: sc around. (10 sts)
Rnd 4: Change to Orange. sc around. (10 sts)
Rnds 5-8: sc around. (10 sts)
Rnd 9: (sc 3, dec) x 2. (8 sts). Fasten off.

Assembly & Final Touches
Face Assembly: Sew the White Eyes onto the Cream Face Panel. Attach small black pupils (or safety eyes). Sew the Face Panel onto the front of the Orange Head.
The Frame: Sew the Brown Hood Trim around the Face Panel. It should look snug and frame the face completely.
Body Building: Stuff the body firmly. Sew the Head to the Body.
Limbs: Stuff the legs and sew them to the bottom of the body. Sew the arms to the sides, slightly angled forward for a "shy" look.
Details: Sew the Blue Pom-Pom to the very top center of the head. Using Brown yarn, embroider a vertical line down the chest for the zipper, and bow-tie strings at the neck.
Tips & Frequently Asked Questions
Q: My head looks too oval, how do I fix it?
A: Ensure you are stuffing firmly as you close the head. You can also roll the finished head between your palms to shape the fiberfill into a perfect sphere.
Q: Can I use felt for the eyes?
A: You certainly can, but crocheted eyes give a higher quality, textural finish that distinguishes a handmade item from a store-bought toy.
A Final Word
There you have it—a small, soft tribute to a beloved character. May he stay safe and warm on your shelf. I look forward to seeing how you bring his personality to life!My dearest creator, I am thrilled we are beginning this journey. There is a special kind of warmth in bringing a character to life, stitch by stitch. We shall ensure this little parka-clad wanderer is sturdy, soft, and utterly charming.
[📸 PASTE IMAGE 1 HERE: The Hero Shot]
About This Creation & Our Angle
This project captures the nostalgia of pop culture through the lens of soft craft. Unlike mass-produced figures, our handmade version offers a tactile, squishy charm that fits perfectly on a collector's shelf or as a quirky desk companion. We are focusing on "clean color transitions" and "expression through shape," turning simple yarn into an iconic character.
Project Snapshot:
📊 Difficulty: Intermediate (Color changes & assembly)
⏰ Est. Time: 4-5 Hours
📏 Size: Approx. 14cm
"The magic of amigurumi lies not in complexity, but in the personality you stitch into the smallest details."
Materials & Tools Needed
🧶 Yarn: DK or Worsted Weight Cotton/Acrylic blend. You will need Bright Orange (Main), Teal/Green (Pants), Dark Brown (Trim/Mittens), Cream/Beige (Face), and a scrap of Sky Blue (Top/Back of hood).
🪡 Hook: 2.5mm (to keep stitches tight and structure firm).
✨ Other Materials: Polyester fiberfill, yarn needle, stitch markers, and black safety eyes (10mm) or black felt for pupils.
[📸 PASTE IMAGE 2 HERE: Side Angle / Variation A]
Abbreviations & Stitches Used
We will be working in continuous rounds.
📍 ch: chain
📍 sl st: slip stitch
📍 sc: single crochet
📍 inc: increase (2 sc in one st)
📍 dec: decrease (sc 2 together, preferably invisible decrease)
📍 BLO: back loop only
The Complete Little Kenny Pattern
The Main Head (The Hood Base)
We begin with the hood. We will start with the Blue (top) and switch to Orange.
Rnd 1: Start with Blue yarn. 6 sc in a magic ring. (6 sts)
Rnd 2: inc in every st around. (12 sts)
Rnd 3: (sc 1, inc) x 6. (18 sts)
Rnd 4: (sc 2, inc) x 6. (24 sts)
Rnd 5: Change to Orange yarn. (sc 3, inc) x 6. (30 sts)
Rnd 6: (sc 4, inc) x 6. (36 sts)
Rnd 7: (sc 5, inc) x 6. (42 sts)
Rnd 8: (sc 6, inc) x 6. (48 sts)
Rnds 9-18: sc in each st around. (48 sts)
Rnd 19: (sc 6, dec) x 6. (42 sts)
Rnd 20: (sc 5, dec) x 6. (36 sts)
Rnd 21: (sc 4, dec) x 6. (30 sts)
Artisan's Note: Begin stuffing firmly here. We need a round, oversized look for that classic "chibi" aesthetic.
Rnd 22: (sc 3, dec) x 6. (24 sts)
Rnd 23: (sc 2, dec) x 6. (18 sts). Fasten off, leaving a long orange tail for sewing to the body.
The Face Panel
This piece sits inside the hood. Use Cream/Beige yarn.
Rnd 1: 6 sc in a magic ring. (6 sts)
Rnd 2: inc in every st around. (12 sts)
Rnd 3: (sc 1, inc) x 6. (18 sts)
Rnd 4: (sc 2, inc) x 6. (24 sts)
Rnd 5: (sc 3, inc) x 6. (30 sts)
Rnd 6: (sc 4, inc) x 6. (36 sts)
Rnd 7: sc around. (36 sts). Fasten off, leaving a long tail for sewing.
The Eyes (Make 2)
Using White yarn.
Rnd 1: 6 sc in a magic ring. (6 sts)
Rnd 2: inc in every st around. (12 sts)
Rnd 3: sl st in each st around (makes the edge smooth). Fasten off.
Artisan's Note: If using safety eyes, insert them into the center of these white circles before sewing the circles to the Face Panel.
The Hood Trim
Using Dark Brown yarn. This creates the furry lining look.
Row 1: Ch 40 (measure against your face panel to ensure it wraps around).
Row 2: Starting in 2nd ch from hook, hdc in each ch across. (39 sts)
Row 3: Ch 1, turn. sl st loosely in each st across (adds texture). Fasten off.
The Pom-Pom
Using Blue yarn.
Rnd 1: 6 sc in a magic ring. (6 sts)
Rnd 2: (sc 1, inc) x 3. (9 sts)
Rnd 3: sc around. (9 sts)
Rnd 4: (sc 1, dec) x 3. (6 sts). Fasten off.
The Body (Parka)
Using Orange yarn.
Rnd 1: 6 sc in a magic ring. (6 sts)
Rnd 2: inc in every st around. (12 sts)
Rnd 3: (sc 1, inc) x 6. (18 sts)
Rnd 4: (sc 2, inc) x 6. (24 sts)
Rnd 5: (sc 3, inc) x 6. (30 sts)
Rnd 6: (sc 4, inc) x 6. (36 sts)
Rnds 7-11: sc in each st around. (36 sts)
Rnd 12: (sc 4, dec) x 6. (30 sts)
Rnd 13: sc around. (30 sts)
Rnd 14: (sc 3, dec) x 6. (24 sts)
Rnd 15: (sc 2, dec) x 6. (18 sts). Fasten off.
The Legs/Pants (Make 2)
Start with Dark Brown (Boots).
Rnd 1: 6 sc in a magic ring. (6 sts)
Rnd 2: inc in every st around. (12 sts)
Rnd 3: BLO sc around. (12 sts)
Rnd 4: sc around. (12 sts)
Rnd 5: Change to Teal/Green. sc around. (12 sts)
Rnd 6: sc around. (12 sts). Fasten off.
The Arms (Make 2)
Start with Dark Brown (Mittens).
Rnd 1: 5 sc in a magic ring. (5 sts)
Rnd 2: inc in every st around. (10 sts)
Rnd 3: sc around. (10 sts)
Rnd 4: Change to Orange. sc around. (10 sts)
Rnds 5-8: sc around. (10 sts)
Rnd 9: (sc 3, dec) x 2. (8 sts). Fasten off.
[📸 PASTE IMAGE 3 HERE: Detail / Variation B]
Assembly & Final Touches
Face Assembly: Sew the White Eyes onto the Cream Face Panel. Attach small black pupils (or safety eyes). Sew the Face Panel onto the front of the Orange Head.
The Frame: Sew the Brown Hood Trim around the Face Panel. It should look snug and frame the face completely.
Body Building: Stuff the body firmly. Sew the Head to the Body.
Limbs: Stuff the legs and sew them to the bottom of the body. Sew the arms to the sides, slightly angled forward for a "shy" look.
Details: Sew the Blue Pom-Pom to the very top center of the head. Using Brown yarn, embroider a vertical line down the chest for the zipper, and bow-tie strings at the neck.
Tips & Frequently Asked Questions
Q: My head looks too oval, how do I fix it?
A: Ensure you are stuffing firmly as you close the head. You can also roll the finished head between your palms to shape the fiberfill into a perfect sphere.
Q: Can I use felt for the eyes?
A: You certainly can, but crocheted eyes give a higher quality, textural finish that distinguishes a handmade item from a store-bought toy.
A Final Word
There you have it—a small, soft tribute to a beloved character. May he stay safe and warm on your shelf. I look forward to seeing how you bring his personality to life!


Commentaires
Enregistrer un commentaire